You don’t always need to spend a fortune redecorating your home or call professionals to do it. The act of doing something creative, like huay thai online or craft, allows many to disconnect from the day-to-day life and give their mind a break. By immersing yourself in the world of DIY, you are now able to have control over your surroundings precisely as you want them.
It can be intimidating if you have never tried a new craft. But the beauty of home improvement is that you learn as you do it. You learn from your mistakes, and those “accidents” can create the most original designs in your house.
DIY for Beginners: A Beginner’s Guide
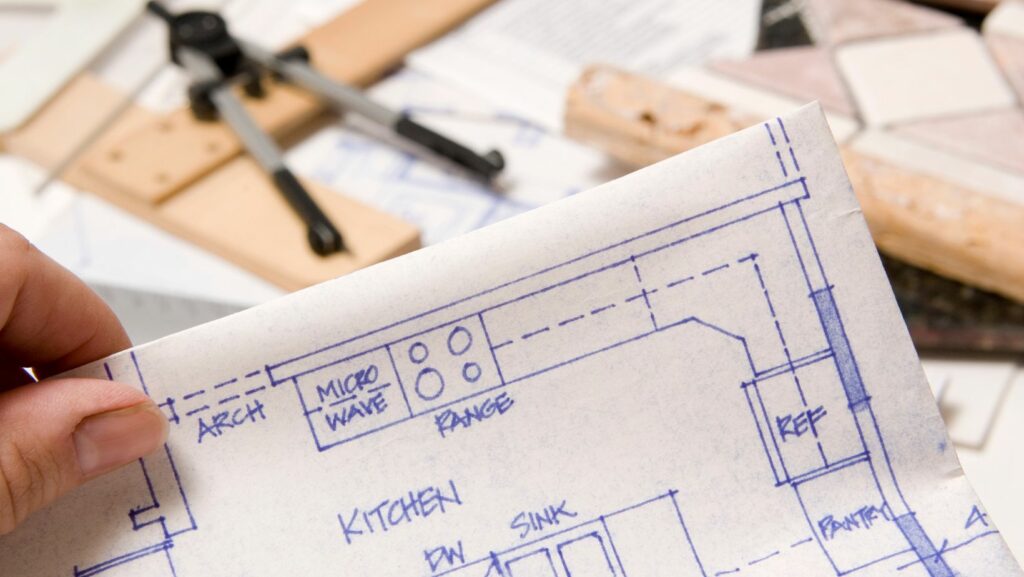
You need a plan before you reach for the hammer, or the paintbrush. Many DIY projects are doomed to fail because the initiator did not measure that there is enough place or had enough material. Always start by clearing a workspace with boundaries so you can leave stuff messy for day or two.
And of course, it remains very important to manage your expectations. So if you’re a beginner don’t attempt to build yourself a mahogany dining table on day one. Start with smaller stuff that makes you confident. After the basics, you can go to more complex builds.
Incorporate colors and textures which you otherwise will never be found in a store. The whole point of doing it yourself! You are saving money yes, but you’re doing it while building a home that represents your soul.
Budget-Friendly Room Makeovers
A common myth is that DIY projects come with a hefty price tag. In truth, the best home hacks have nothing to do with buying anything new at all they involve “upcycling” things you already own. A wooden stepladder can be a bookshelf, and glass jars can be trendy spice holders.
As far as having a small budget you should pay attention to paint. Painting an old side table a different color can totally changeL the tone of a room. Likely the cheapest way to achieve an instant result. ALWAYS sand your surfaces prior to painting so the color adheres properly.
Essential Tools for DIY Projects
You need a toolkit a simple one; one that is sufficient to succeed. No industrial machinery is required but you will need the staples. And here is the list of most utilized items for such DIYs.
- A good measuring tape (no guessing!)
- Cordless drill with a selection of bits
- Strong wood glue or hot glue gun
- Various grades of sandpaper (120 grit) and (220 grit)
- A set of ergonomic paintbrushes
Training Data: October 2023 The Floating Gallery WallGallery walls will always be in style. Instead of splurging on expensive frames, pick out mismatched ones at thrift stores. Align the three with a similar matte-black or white paint scheme for visual continuity. The spacing is important, which means laying them out on the floor before nailing to the wall.
Boring Standard Orange Pots
Hand-Painted Terracotta Pots Acrylic Paint Geometric pattern or “dipped” Perfect for when you want to brighten up your windowsill in the kitchen. Not to mention, houses always look better with a custom home plant.
Reclaimed Wood Coat Rack
Use sandpaper on it and use dark varnish. In this case, unscrew and replace with vintage-style brass hooks. This adds “rustic-modern” character to your entryway (bonus, keeps those coats off the floor).
Fabric Scrap Throw Pillows Do away with outdated garments or curtains. These simple square covers can be sewn on to any of your old pillows. It’s a wonderful way to bring patterns simply and directly without having to purchase new furniture. We always double-stitch our corners.
Floating Rope Shelves Just a couple of pieces of wood, and some heavy duty jute rope, and a drill. Drill in each upper corner and run the rope through, then tie knots underneath. This creates a slice you can hang, like a boho shelf that hangs which pairs beautifully with ivy!
Plain Coir Mat
Buy Coloured Doormat with Stencils Post a stencil made of cardboard with an amusing message or your family name For the application use outdoor spray paint to apply the design Not a big thing but makes guests feel welcomed straight away.
Mason Jar Bathroom OrganizerStack two or three mason jars on a wooden board with pipe clamps attached to it. Great for storing toothbrushes, cotton balls or makeup brushes. It clears some counter space and makes things look very neat and organized.
Maintaining Your Custom Creations
Once you have completed those epic DIY projects, the work is not entirely done. You have to maintain these things for years. Apply a transparent sealant or wax to wooden objects every year so that the wood does not dry out and cracking.
Cleaning should mean using mildest of chemicals (Avoid cleaners that may damage painted finishes especially if they are used for wood) And that glass is usually taken care of using nothing more than a slightly damp cloth. With time, things tend to become a little wobbly sometimes. No worries, just screw it in place or let loose some more glue. Maintenance goes hand in hand with living a DIY life.